Crozet Play School

Kids at Play in Crozet


Leave a comment

Seeds and Sprouts

We made little sprout houses for the window sill.  We filled the sprout houses with a wet paper towel and three sugar snap peas.  I soaked the peas overnight to get them softened up and ready to germinate!  Using the sprout houses allows the children to look closely at the life cycle of the seed.  They can peek at what happens “beneath” the soil!  Every other day we pulled out a set of seeds from the houses to check on them and see how they have grown.

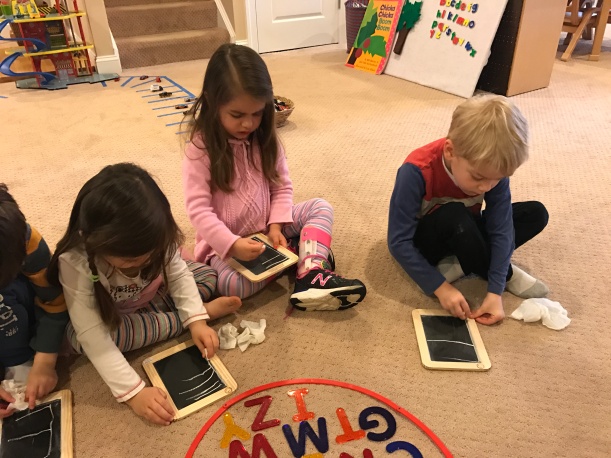
The students documented their learning in our journals.  We asked them to write ‘seed,’ ‘sprout,’ and ‘roots’ in their journal to label the different parts of the seed.  This was their first time working on labeling and they did an excellent job!

IMG_5505.JPG

Here is a video of the learning journals:

For the last stage of the project everyone modge podged little potters to take their sugar snap pea sprouts home.  They got to use a spade to place potting soil in the pots, and dig a small hole for the seeds!

Last week we also worked on a few extremely top secret Mother’s Day Projects.  The children used liquid watercolors to die large portions of paper towels.

IMG_5422.jpg

Once these dried, we folded them into flowers and peeled the paper towels apart.  The results were stunning!

IMG_5438.jpg

The second project was a very large piece of contact paper rolled out on our tables.  The children pulled petals off of flowers to place them on the sticky paper.  I sealed the petals up, and then I cut them out in the shape of hearts.  The children told me little messages for their mommies and I dictated their words.

Lastly, we painted clear plastic plates with acrylic paints.  Then I sprayed each plate with a sealant and attached a garden stake.  They made the perfect homemade garden signs!

Here are a few little ones lined up to show Mommy their creations!

IMG_5510.JPG

I hope everyone had a lovely Mother’s Day weekend!


Leave a comment

Eggstra Fun!

IMG_4788.jpg

We had a great time incorporating some Easter themes into our days in April.  Above is a picture of an activity we had out on the light panel.  The children could crack open an egg, find the letter on the Handwriting Without Tears ABC chart.  We have used this chart for various activities throughout the year, so the children are familiar with the organization of the letters.  They enjoyed the cracking of the eggs as much as the letter hunt!

Table Invitations:

IMG_4578.jpg

One of the art invitation was an egg wrapping station with yarn and poster board egg shapes.  I cut small slits on the edges of the eggs to allow the yarn to hook and wrap.  Then I offered them a variety of colors and scissors for each child to switch colors during their wrapping.  This project encouraged the development of hand-eye coordination.


IMG_4958.jpg

I made a little “Chick Village” play tray for the children.  They could use the paint brushes to sweep the rice for the chickens, or move the rice to different areas of the tray.  The little wooden frame provided a house area for the Mama and baby chicks to live.  This was a simple set up that provided lots of open ended play.

Easter Themed Play Dough:

IMG_4577.JPG

We also had a beautiful batch of yellow dough that we added many Easter themed materials to go with it!  The children had cookie cutters, spring gems with flowers, carrot eggs and much more.  They were very creative with their play dough creations!

IMG_4574.JPGIMG_4576.JPG

Process Art:

Egg decorating is one of my favorite activities!  I love to try different techniques each year, and the children are always up for a creative way to sue the art supplies.  The first technique we tried was shaving cream and watercolors.  I will admit this technique was a bit of a bust.  The best eggs were in the first batch.  They truly had a very marbled look to them, but as the children continued to mix the eggs in the cream they lost their marbled look.  This would be a good technique if you just had one or two kids that were dying, but it didn’t lend itself to many kids in the classroom.

IMG_4781.JPG


IMG_4780.JPG

Although the puffy shaving cream is always a hit!

The second day we tried a new technique of dripping watercolors onto the eggs.  They turned out beautiful!

IMG_4822.JPGIMG_4823.JPGIMG_4820.JPGIMG_4827.JPGIMG_4829.JPGIMG_4831.JPG

365CADF3-66BA-49C5-8D21-9518D7BF9C34.jpgIMG_4834.JPGIMG_4836.JPG

These turned out so bright vibrant!  I loved the colors and how they popped on the egg shells!  Squeezing and squirting the liquid watercolors is always a satisfying process for the children too.

Marbled Eggs:

IMG_4874.JPG

The children had so much fun with the shaving cream, I wanted to do another project with it!  We used the shaving cream to create a marbled technique on card stock!  First I made a layer of shaving cream on tin foil.  Then the children picked the colors they wanted to use to drip acrylic paint onto the shaving cream.  After they swirled the paint in the cream, we pressed the card stock onto the cream.  After it sat on the card stock for a few minutes we scraped it off!  The results were just wonderful!  Unfortunately, I completely forgot to get a picture of the final product:( I know the kids and parents loved them!

IMG_4869.JPG

IMG_4872.JPGIMG_4855.JPG


IMG_4871.JPGEgg Wrapping:

On a whim I purchased a bunch of paper mache type eggs at Walmart.  Then we added sharpies, washi tape, and scissors to wrap, cut and decorate the eggs.  This was one of the most popular activities, and the children created many eggs throughout the week.  I am sometimes surprised how the simple things are the most fun for the group.

IMG_4852.JPGIMG_4851.JPG

IMG_4853.JPGIMG_4825.JPG

Egg Hunts:

We ended all of our Eggstra Fun with a giant Egg Hunt outside!  Thank you to all of the parents for supplying eggs that were filled with fun treats and surprises!


IMG_4818.JPGIMG_4817.JPGIMG_4813.JPGIMG_4809.JPGIMG_4811.JPG


IMG_4779.JPG


IMG_4804.JPGIMG_4807.JPG


Leave a comment

Fizzing Watercolors

IMG_5249.JPG

We tried a fun science experiment this week that is extremely cheap and simple to set up!  Parents can do this at home for just a few dollars, and it provides lots of fun!  I filled an old egg crate with little amounts of baking soda.  Then I made small bowls filled with vinegar which I colored with liquid watercolors.  Then the students used the droppers to drip into the different compartments.  Not only did it fizz, bubble, and make a reaction, it also provided a chance to do some color mixing.

IMG_5235.JPG

IMG_5239.JPG

In addition to the science skills that are being explored, the children also had to really focus and concentrate to get the vinegar into each of the different areas using hand/eye coordination and fine motor skills.

IMG_5241.JPG


IMG_5221.JPG

The standards that are being met are:

  • predict changes to matter when various substances are to be combined
  • observe and conduct simple experiments that explore what will happen when substances are combined

IMG_5228.JPG

Doing this activity on the light table just added an element of sensory input, and often will encourage a longer attention span from learners.

IMG_5234.JPG

IMG_5361.jpg


IMG_5362.jpg


IMG_5359.jpgIMG_5360.jpg

Everyone really enjoyed this activity, and they were extremely focused when they were working with the science materials.  I’m proud of how much they have learned this year!


Leave a comment

Wildrock Adventure

IMG_5305.JPG

We had the most wonderful field trip this week to the beautiful Wildrock Park.  The views were breathtaking, and we couldn’t have dialed up any more perfect weather!  Our adventure started in the woods, crossing a stream to find the activities that had been prepared for our group.

IMG_5276.JPG

We had to cross the stream with large rocks and the adventure began!

IMG_5288.JPG

We were so lucky to have one of our very own Moms as the leader for our field trip. Mrs. Sarah lead one of the stations that was a color hunt into the woods.  The children did a great job finding all of the colors of the rainbow during their nature walk.

IMG_5279.JPG

One of my favorite activities was a hunt for wooden gnomes.  The kiddos had to look carefully through the woods to find lots of different gnomes for them!  They had so much fun with this, and it would be very simple to set up at home!  Before they left the station, they had the hide the gnomes for the next group.

IMG_5302.JPG

The #1 station was definitely the “mud kitchen” set up by the stream.  There were boots, pots, pans, spoons, nets, and lots of fun equipment to go digging in the mud!

IMG_5292.JPG

There were a few other stations that I forgot to capture on camera, but we also loved building fairy houses and going on an animal hike.

Our last stop was a lunch after our morning adventure!  We gathered around the camp fire, and everyone enjoyed the sunshine and beautiful weather.

IMG_5306.JPG

Thank you Wildrock for the most beautiful outdoor adventures!  We will definitely be back!


Leave a comment

Our Ice Cream Field Trip

IMG_5113.JPG

We had such an excellent time on our field trip last week to the creamery!  The children enjoyed watching the ice cream getting made, and of course taste testing the final product!  It is pretty cool when your yoga instructor is also the local ice cream shop owner!  Thank you Mrs. KayIMG_5080.JPG

First She poured in the cream and sugar mixture

IMG_5077.JPG

After the machine beeped at us, we had to stand back to watch Mrs. Kay get the ice cream out of the machine.

IMG_5085.JPG

Then she let us pick our favorite flavors for a giant taste test!

IMG_5096.JPGIMG_5097.JPGIMG_5109.JPGIMG_5105.JPGIMG_5092.JPGIMG_5099.JPGIMG_5112.JPG

And the biggest adventure of all was walking there and back with this silly crew!  We made it though!

IMG_5066.JPG

This is just a small glimpse from what we have been up to these past few weeks!  I am excited to share more of our adventures!  Coming soon, Clare


Leave a comment

A Series of Learning Videos

In February I shot a few short videos of two students working together on the magnetic board. I wanted to share them with you and note a few things:

The students are doing their own alphabet activity, even though I had something different laid out on the magnetic board that corresponded with the sorting circles from the previous blog post.  This is one of the aspects I love about the Reggio Emilia Approach…letting children find their way and explore the classroom as they wish.  I didn’t stop the activity or try to re-direct them.  They were on-task, learning, and being 100% appropriate.

Secondly, they are working together, as a team.  This is called “scaffolding” in early childhood lingo.  One student is expanding the knowledge of another student in a stair step model.  They are learning from each other.  One is teaching, one is learning.  The model reverses itself through the videos…

The two students start to talk about some other things in this video, but then get back on track with looking for letters.  They are helping each other in such a great way!


Next, B continues with the work on his own and gets really far through the alphabet.


Lastly, another student comes along.  She quietly observes, and doesn’t interrupt his play.  But, she is taking in the lesson in her own way!  Learning from a different angle.

This is just a short series of videos that I captured, but I thought it demonstrated how active learning takes place in our classroom each and every day!


Leave a comment

Letters, Letters Everywhere

IMG_3405.JPG

We have tried to incorporate letters into many of the learning activities this late winter.  We have done a number of letter activities that the kids have loved!

These pictures are from some beautiful letter names the children made with sequence pieces, and glue.  They had to work very diligently to get the many pieces of sequences on their name. Each name turned into a work of art, and the kids were very proud of them!


IMG_3318.JPGIMG_3316.JPG

IMG_3254.JPG


IMG_3253.JPG

Here is a video of some children working on their names:

Light Play:

IMG_3004.JPG

On the light panel I used small pink glasses to write upper and lower case letters on two sets of glasses.  The children had to find the lowercase match from around the edge of the light panel to match to the uppercase letter in the center of the light panel.

Below are some pictures of D and J matching up the letters on the light panel.

IMG_3006.JPGIMG_3009.JPG

Some of our glasses cracked so we added in new colors and alphabet letters:

IMG_3219.JPG


Large Group Lessons:

IMG_3028.JPG

In our large group circle time, we have done a series of lessons from the Handwriting without Tear Program.  I also added some sorting letters activities at the end of our circle time.  I pulled out the large sorting circles, and we studied the letters together as a whole group.  The first sort we did was: Letters with Straight Lines & Letters with Curved Lines.  These lessons allow children to take a closer look at each letter, what components make up the letter and how it is formed.  After I sorted a few of the letters first, I had each child come to the front of the room to be the ‘teacher.’  They sorted a letter or two for their friends, and the children watching got to check their answer!

Below B is examining his letter before sorting:

IMG_3016.JPG


IMG_3020.JPG

A short clip from our sorting lesson:

IMG_3021.JPGIMG_3023.JPGIMG_3019.JPGIMG_3026.JPG


After we finished the activity I cleaned up the letters, but left the sorting circles out for choice time.  Below is a picture of J and she sorted the entire alphabet by herself!  I love when they extend our group learning into their class time choices!

Here is a video of J sorting her letters:

J posing with her circles:

IMG_3032.JPG

Lastly we used our mini chalkboards to practice our letter writing!  The Handwriting without Tears chalkboards use mini pieces of chalk to encourage the correct pencil grip, and give students just the perfect amount of space to practice their uppercase or lowercase letters:

IMG_3195.JPGIMG_3194.JPGIMG_3197.JPGIMG_3198.JPG

Everyone holding up their different letters:

IMG_3196.JPG

In our play time area I set up a very large parking lot with the matchbox cars and the garage.  Each car had a letter written on the top of it with tape, and then they had to park the cars in the corresponding parking lot!

IMG_3105.JPGIMG_3113.JPG

Sensory Play:

I set up a large kinetic sand tray with our ABC stamps for the children to explore.  They could dig in the sand and press the stamps into the kinetic sand to see the impressions of the letters.

IMG_3189.JPGIMG_3190.JPG

Dinosaurs and Letters:

A few of my students just love dinosaurs!  I thought I would incorporate both of these ideas into a sensory table.  I added sand, plastic dinosaurs, and then some salt dough letter cakes I made with my students a few years ago.  The letters are pressed into the cakes, and are fun to uncover in the sand!

IMG_3107.JPG


More of our past February activities will be shared soon!  I will slowly be catching up with our posts over spring break since my computer is back:)


Leave a comment

Lines and Curves

IMG_3172.JPG

Spielgaben Study

IMG_3191.JPG

Last week I set up this simple invitation to study lines, curves, and shapes in a variety of ways using our Spielgaben wooden pieces.  Four years ago my families from Crozet PlaySchool all got together and bought this beautiful math set.  I look forward to using it each year!  The pieces provide open ended math exploration.

On one side of the table I put four cork circles, and on the other side of the table was the large wooden grid that is part of the math set.

I let the children use the pieces to create their own designs, and their imaginations were their only limit.

IMG_3173.JPG

IMG_2979.JPG

IMG_3182.JPG


IMG_3181.JPG


IMG_3167.JPG


IMG_3170.JPG

IMG_3216.JPG

Swirls and Lines

Then I moved the Spielgaben to the block area in the classroom and set up the chalkboard table top.  On the table I drew a series of lines and swirls, along with offering a large supply of gems.  They children loved this activity, and we changed the drawings on the table throughout the week.

IMG_3536.JPGIMG_3534.JPG


IMG_3518.JPG


IMG_3450.JPG


IMG_3546.JPG

We will see where this exploration takes us in the weeks to come!


Leave a comment

Celebrating Dr. Suess

IMG_3379.jpg

We had such a fun week celebrating Dr. Suess and all of his wonderful works the first week of March!  We started our celebration by creating our own “Cat in the Hat” inspired hats.  Then I painted each child with a kitty face!  They sure did look like some cute kitties.

Dr. Suess Inspired Art

IMG_3439.jpg

Another activity the children did was Dr. Suess inspired paper art project.  The invitation had strips of paper, glue sticks, and some Dr. Suess books opened for inspiration.  I modeled how to put a little bit of glue on each end of the construction paper, and then hold them down to create an arch.  They got right to work, and the paper art turned out very colorful!

IMG_3430.JPG


IMG_3434.JPG

IMG_3435.JPG

IMG_3442.jpg

“Yertle The Turtle” Book Study

The second book we read over a few days was “Yertle the Turtle.”  This book is about a very mean king that wants his throne to be higher and higher, even if it hurts the other turtles in the pond.  It is a creative book about rights for everyone, even the turtles at the bottom of the pile.  The children loved the story and we read it a number of times!

51lQv1he+qL._AC_US218_.jpg

IMG_3499.JPG

We also made an Anchor Chart after reading the book.  An anchor chart is a way to categorize different parts of the story and discuss the beginning, middle, end or problem/solution.

After the book we created ‘turtles’ using rocks and acrylic paints.

IMG_3537.JPGIMG_3538.JPGIMG_3517.JPGIMG_3506.JPGIMG_3510.JPGIMG_3511.JPGIMG_3513.JPGIMG_3502.JPG

IMG_3539.JPG

Cooking up Alphabet Soup

Lastly we cooked some delicious ABC soup!  We used Dr. Suess’s ABC book as our inspiration.  We added carrots, celery, onion, alphabet pasta and chicken broth to the pot.  Most of the kids gobbled it up!

51lbNnW+9pL._AC_US218_.jpg

IMG_3369.JPGIMG_3368.JPGIMG_3370.JPGIMG_3374.JPG


I’m so glad to have my computer back!  More blog posts coming soon!


Leave a comment

Letters and Shapes

IMG_2711.jpg

Amongst all of our Valentine’s Day fun we have been still continuing with our investigation of letters and shapes.  Above is a picture of L and B looking closely at the large uppercase letters on the overhead projector.  They were lining up the letters, finding the letters in their names, discussing the letters as the pulled them out of the basket, and wondering why some letters looked “backwards” no the wall.  It is wonderful to see two children work for an extended period of time at one task, and scaffold each other with new information while they “play.”

Preschool Math:

IMG_2664.JPG

Since there is so much emphasis on the Heart at Valentine’s Day, I deduced to introduce other shapes through a series of books and activities this week.  We read some of my favorite shape books this week!  These are some of the titles we have been exploring…

This is a book of pictures and you can find shapes in each of the real-life photos

51KFsgTp8qL._AC_US160_.jpg

The Greedy Triangle introduces the idea of geometry with lines and angles, but we focused on the shapes the triangle changes into from page to page.

51eYAUsbRUL._AC_US160_.jpg

This is a great book that covers many different types of of shapes

61P208MFBDL._AC_US160_.jpg

After reading many of these books we went on “Shape Hunts” around the classroom looking for shapes all around us!  The picture above is A holding up the Handwriting Without Tears wooden pieces into a circle.

We found Squares…

IMG_2670.JPG

A line and a square found by M…

IMG_2666.JPG

A circle and a rectangle found by H

IMG_2665.JPG

A semi circle and a rectangle found by D…

IMG_2668.JPG

A Rectangle and a Heart found by B…

IMG_2669.JPG

A Heart and Circle found by A…

IMG_2710.JPG

M found a circle on the edge of her cup…

IMG_2705.JPG

L found a circle and a line

IMG_2703.JPG

It was a lot of fun to do our shape hunt, and I was proud of how creative they were with their findings!

Process Art:

Of course we had to paint some shapes…We made these gorgeous Heart Mobiles with cardboard and tempera paints:

IMG_2776.JPG

IMG_2676.JPG

IMG_2674.JPG

IMG_2677.JPG

Sensory Play:

We also explored hearts, pink salt, glass jars, and paintbrushes on the light panel this week:

IMG_2648.JPG

IMG_2647.jpg

IMG_2643.JPG

We made the most amazing SLIME from Fun at Home with Kids recipe on her blog!  It turned out perfect and the kids enjoyed it so much!!!

IMG_2741.JPG

IMG_2740.JPGIMG_2735.JPGIMG_2730.JPGIMG_2733.JPGIMG_2726.JPGIMG_2718.JPGIMG_2720.JPGIMG_2721.JPGIMG_2713.JPGIMG_2762.JPGIMG_2761.JPGIMG_2764.JPG

We were also so lucky to get to go outside and on a bunch of walks this week with the warmer temperatures!  Ms. Kay came for yoga as well and we did partner yoga for the first time!

Preschool Gross Motor Development:

IMG_2631.jpgIMG_2628.JPGIMG_2629.JPGIMG_2683.JPGIMG_2678.JPGIMG_2679.JPGIMG_2688.JPGIMG_2687.JPGIMG_2686.JPG

Yep, I pretty much love my job!  What a great week!  Ms. Clare